
Hello, crafty friends! Today, I’m excited to share with you a fun technique I’ve been experimenting with: using glossy accents to create cards that look good enough to eat! Who doesn’t love a chocolate biscuit or a scoop of ice cream? Well, now we can make cards that capture that delicious appeal.
The inspiration for this project came from Spellbinders’ latest release, particularly their scalloped edge rectangle dies. When I saw them, I immediately thought of those Petit Ecolier cookies I loved as a kid – you know, the ones with chocolate on top and a biscuit underneath. I thought, “How cute would that be as a card?” So, I set out to make it happen.

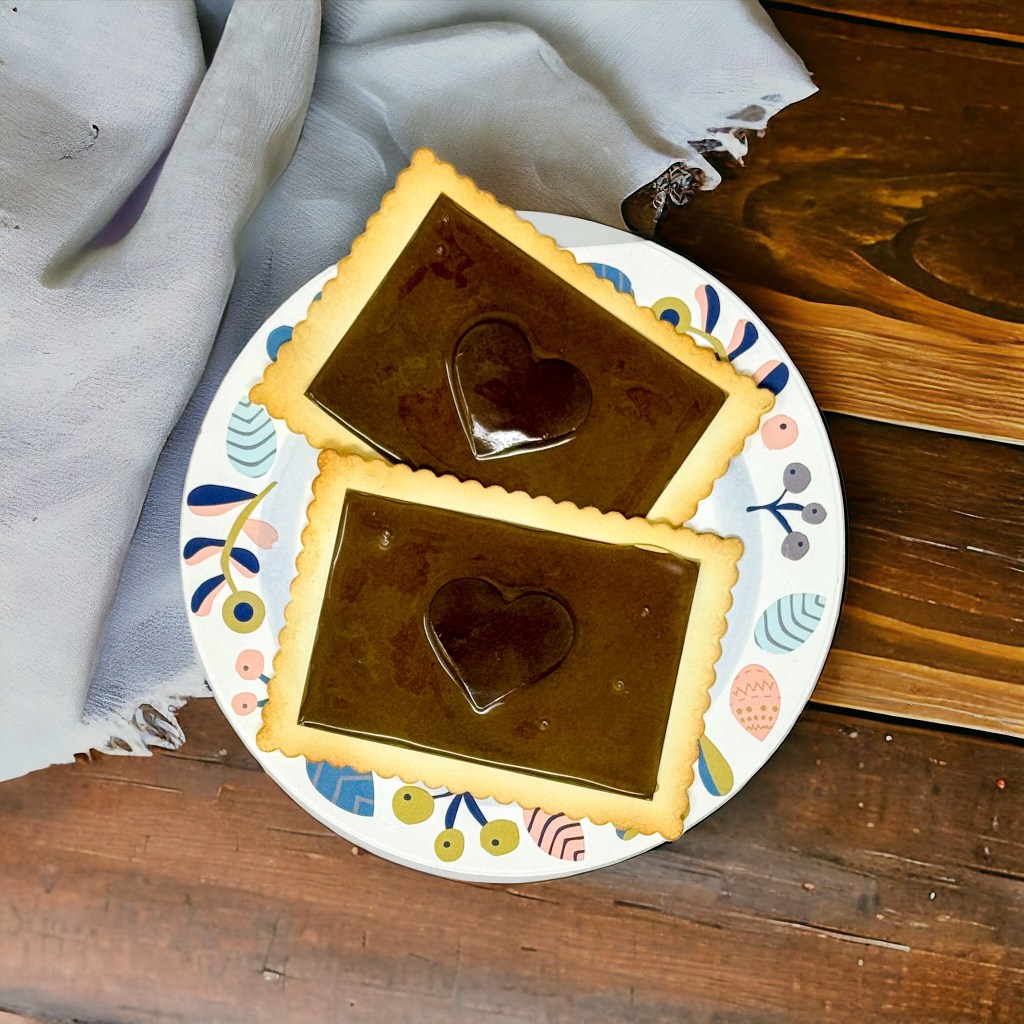
For our first card, we’re creating a plate of chocolate biscuits. Here’s what you’ll need:
- Spellbinders scalloped edge rectangle dies
- Cream-colored cardstock
- Dark brown cardstock
- Distress ink and a blending tool
- Heart-shaped dies (optional)
- Foam squares
- Glossy accents
- Large circle die
- Decorative transfers (optional)
The process is pretty straightforward. We’ll use the scalloped rectangle dies to create our “biscuits,” then add a layer of dark brown cardstock for the “chocolate.” To give them that freshly-baked look, we’ll use distress ink around the edges. For an extra touch, I added little heart shapes to the center of each biscuit.
Now, here’s where the magic happens: the glossy accents. This clear, glue-like substance dries to a raised, shiny finish that really sells the illusion of chocolate. Be sure to work quickly as it starts to set fairly fast, and give it at least 24 hours to dry completely. Trust me, I’ve learned the hard way that rushing this step can ruin your hard work!
For the card base, I created a “plate” using a large circle die. I even added some decorative transfers to make it look like a fancy china plate. In hindsight, this might have been overkill, but I think it adds to the charm.
Once everything is dry, simply arrange your “biscuits” on the “plate,” and voila! You have a card that looks good enough to eat. I actually had people think these were real cookies when they saw a picture!
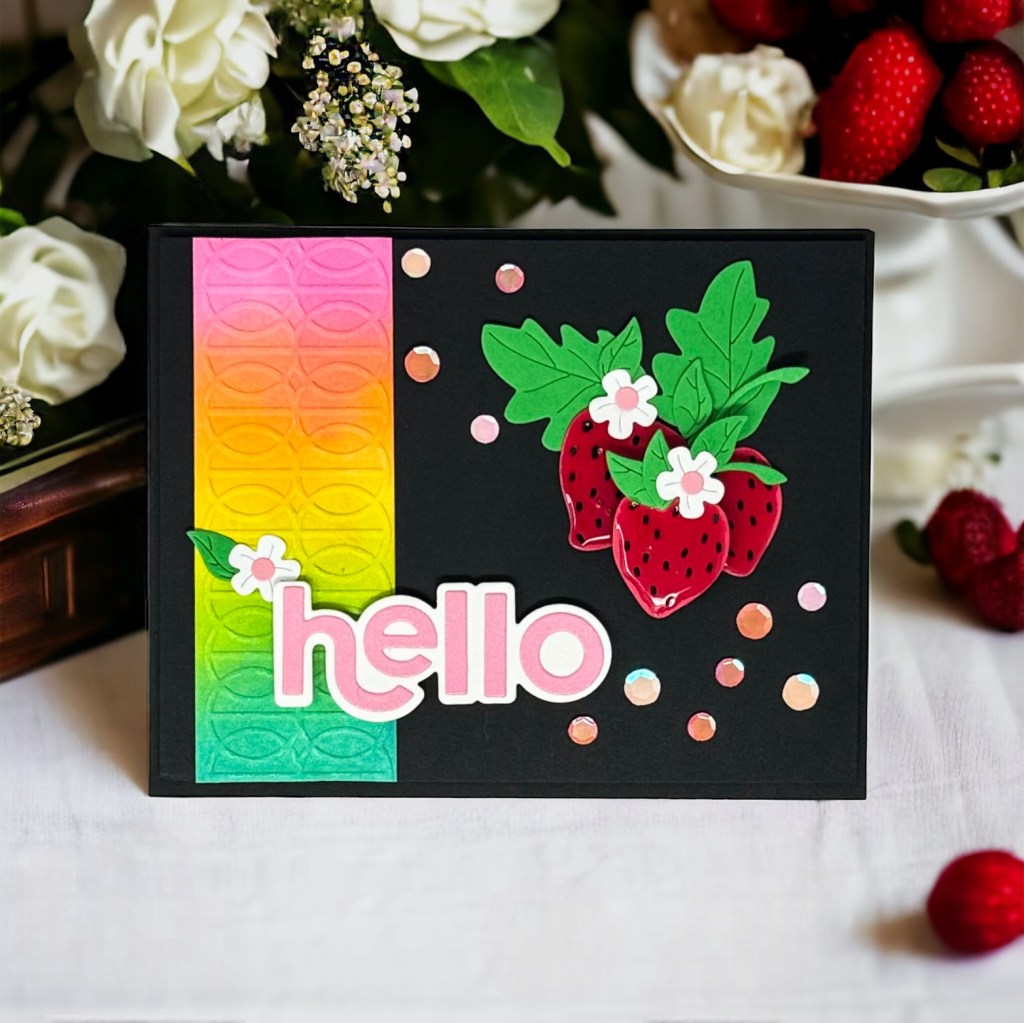
But why stop at cookies? This technique works great for other sweet treats too. I also made cards featuring ice cream cones and strawberries using the same glossy accents technique.

For the ice cream cone card, I used dies and embossing folders from a Spellbinders Advent calendar set. I created a rainbow background using my favorite distress ink trio: picked raspberry, mustard seed, and peacock feathers. The ice cream scoops were made to match these colors.
To really sell the ice cream illusion, I added faux sprinkles on top of the glossy accents. Pro tip: use plastic sprinkles, not real ones, as real sprinkles can melt and get messy over time. I found some great ones at the Dollar Tree.
For the strawberry card, I used another die set from the Advent calendar. Remember to put a dark backing behind the “seed” cutouts on the strawberries, or the background color will show through.
In all cases, patience is key. Let your glossy accent elements dry for at least 24 hours before assembling your final card. It’s hard to wait, I know, but the results are worth it!
I hope this inspires you to try using glossy accents in your cardmaking. It’s a fun way to add dimension and realism to your designs. If you give it a try, I’d love to see what you create!
Remember, crafting is all about experimenting and having fun. Don’t be afraid to try new techniques – you might just discover your new favorite trick!
Until next time, happy crafting!
These titles aim to capture the fun and unique aspect of creating cards that look like food, while also highlighting the main technique used (glossy accents).
SUPPLIES IN THIS VIDEO:
Heartfelt Thanks and Scallops https://shrsl.com/4d2vm
Glossy Accents https://shrsl.com/4dh7y https://amzn.to/48PN7iM

Leave a comment