
Hello fellow crafters! I’m thrilled to have you join me on this crafting journey today. In this blog post, I’m excited to share my experience with the Spellbinders January 2024 Stitching Die of the Month kit, aptly named “Be Stitched.” This kit is a treasure trove of creativity, featuring an adorable bumblebee design that will surely ignite your crafting inspiration. Join me as I explore the contents of this kit and walk you through the process of creating two stunning cards using these fantastic dies and a dash of creativity.
Unboxing the Kit:
Before we dive into the crafting process, let’s take a closer look at what the Spellbinders January 2024 Stitching Die of the Month kit has in store for us. This kit not only includes the bee-shaped stitching die but also intricate flower components and everything you need to bring your creative vision to life. What sets these stitching dies apart is their user-friendly design, complete with guidelines for stitching, making them accessible even for beginners like me. Following these lines ensures that your finished piece looks nothing short of stunning.
Creating Card #1 – A Bumblebee Beauty:
For my first card, I decided to focus on crafting the adorable bumblebee. To assemble this charming insect, I gathered various cardstocks: a shimmering gold one for the body, a delicate shimmer vellum for the wings, and plain black cardstock for other body parts. To simplify the process, I reached for an embroidery kit I purchased on Amazon, which came with pre-wound bobbins, a vibrant array of thread colors, and all the essential accessories. (Embroidery Kit https://amzn.to/48KVMTw )
Bringing the Bee to Life:
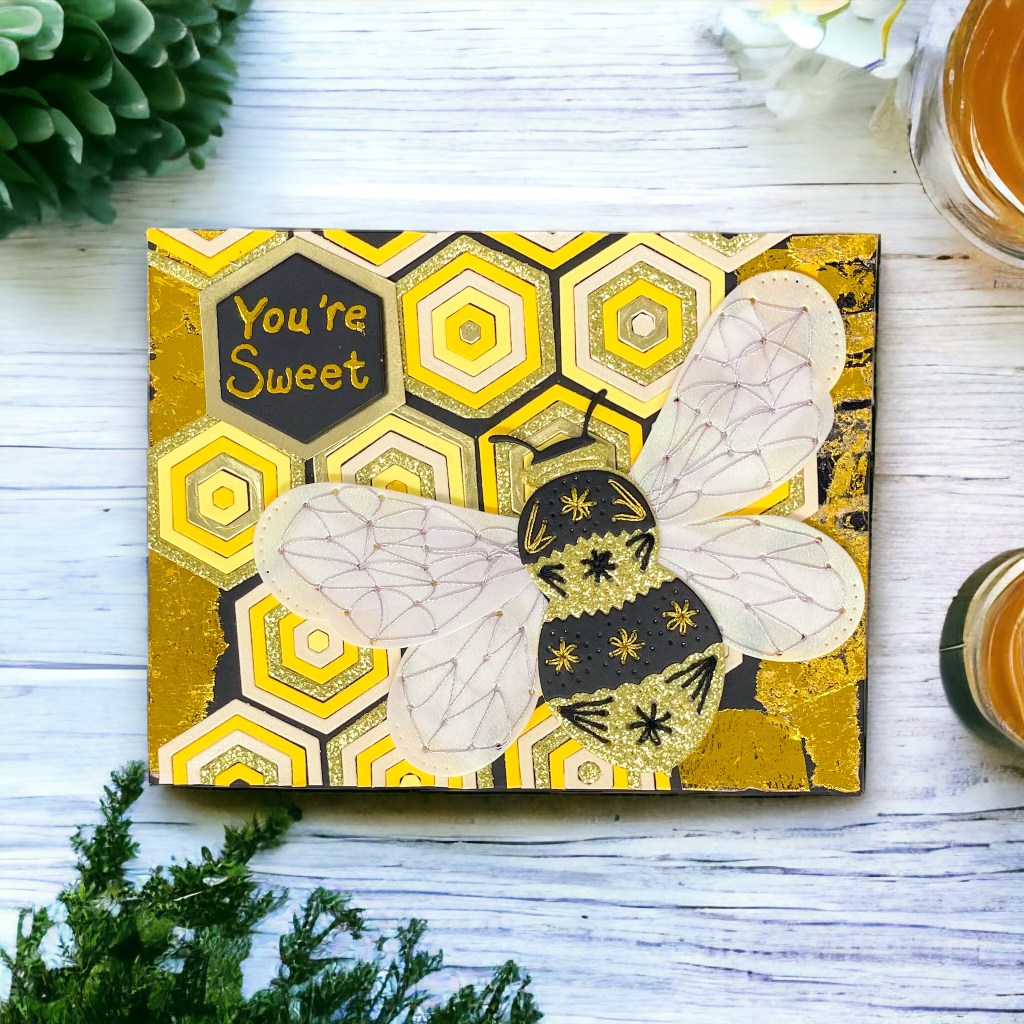
To make the bee come alive, I carefully followed the die’s impressions and stitched along the guidelines using black thread. The result was a beautifully detailed bee that truly stands out. Next, I glued the bee’s components together, creating a delightful centerpiece for my card.
Adding a Personal Sentiment:
Since the kit didn’t include a sentiment, I decided to get creative and make my own. I used a glue pen to write out my chosen sentiment. Once the glue dried, I applied Gina K foils, transforming my handwritten sentiment into a shining feature. This foil technique is a fantastic way to add a touch of elegance to your projects, even without a foil machine.
Adding a Unique Touch:
To elevate the card’s design further, I decided to experiment with hexagon dies from Spellbinders. These versatile dies cut out different-sized hexagon frames, perfect for creating layered effects. I used them to craft an eye-catching background for the card, selecting various cardstocks to add dimension.
For a unique touch, I used double-sided tape with a jagged edge to mimic dripping honey. This clever addition enhanced the card’s thematic appeal, and it’s an effect that you can easily recreate using foil scraps from previous projects.
Completing Card #1:
With all the elements in place, I assembled the card. The bee took center stage, and the carefully designed hexagon background added a harmonious touch. The resulting card exudes charm and creativity, a testament to the versatility of the Spellbinders stitching die.
Creating Card #2 – The Gatefold Garden:
For my second card, I wanted to embark on an imaginative journey. I envisioned creating a gatefold card that would feature the bee in a unique way. This called for some creative thinking, as stitching the bee and cutting it in half presented a challenge.
Assembling the Gatefold Card:
To start, I divided an 8.5″ by 11″ sheet of paper into two halves and scored it to create a gatefold card. This format added an interesting dimension to the project, allowing for a delightful surprise inside.
Enhancing the Background with Flowers:
I employed the kit’s flower dies to enhance the background. Layering teal and shimmery beige cardstocks created a shadowed effect, accentuating the intricate floral patterns. The result was a captivating backdrop that complemented the bee’s design perfectly.
Highlighting the Bee’s Details:
To emphasize the bee’s details without stitching, I turned to glitter pens. These pens, available in various colors, helped connect the die’s impressions, achieving a similar effect to stitching without the needlework.
Cutting the Bee in Half:
Now, here’s where the real magic happened: I decided to cut the bee in half. Using a Spellbinders tool designed for foil cutting, I ensured a precise division. This innovative approach allowed me to incorporate the bee into the gatefold design seamlessly.
Completing Card #2:
With the bee in two pieces, I crafted a gatefold card with a surprising twist. The gatefold format added an exciting dimension to the card, making it a memorable piece of art. As a final touch, I added sentiment elements and distressed the edges, creating a charming and unique card.

Conclusion:
My crafting adventure with the Spellbinders January 2024 Stitching Die of the Month kit was a delightful journey filled with creativity and innovation. Whether you choose to stitch the bee or explore other techniques, the possibilities are endless. I hope these two card-making projects inspire you to dive into the world of crafting with passion and imagination.
SUPPLIES USED IN THIS VIDEO:
Jan 24 Bee Stitching Die: https://shrsl.com/4d2wu
Hexagon Die https://shrsl.com/4dbf6
Fancy Foil Gold https://shrsl.com/4db9o
Gelly Roll Glitter Metallic https://amzn.to/4aQxMR5
Sakura Glue Pen https://amzn.to/48JFOsV
Embroidery Kit https://amzn.to/48KVMTw (Affiliate links used at no cost to you. I was given the stitching die for free to demonstrate.)

Leave a comment